Have you conquered the challenge of hanging drywall? Now comes the crucial step to a professional-looking finish: sanding. Drywall sanding might seem straightforward, but mastering the technique takes practice and knowledge.
This guide contains the secrets to achieving a smooth, paint-ready surface and transforming your home renovation project.
Understanding the Importance of Sanding
Drywall panels (gypsum board, plasterboard, or sheetrock) are joined using seam tape and drywall mud (joint compound) to create a seamless wall or ceiling.
However, these applications leave ridges, dips, and imperfections. Sanding eliminates these irregularities, ensuring a uniform surface for flawless paint application. Here’s why sanding matters:
- Achieves a Smooth Finish: A properly sanded wall feels smooth to the touch and creates a visually appealing canvas for paint.
- Promotes Even Paint Application: Paint adheres better to a smooth surface, reducing the risk of uneven coverage or roller marks.
- Minimizes Paint Consumption: A smooth surface requires less paint as it eliminates areas where paint could soak in unevenly.
- Prevents Paint Failure: Uneven surfaces can lead to paint peeling or cracking later.
Gearing Up for Drywall Sanding
Before diving in, ensure you have the proper tools and equipment for a safe and efficient sanding experience:
Personal Protective Equipment (PPE):
Protect your lungs from dust with a respirator equipped with a fine-dust filter. Wear safety glasses to shield your eyes from debris.
Sanding Tools:
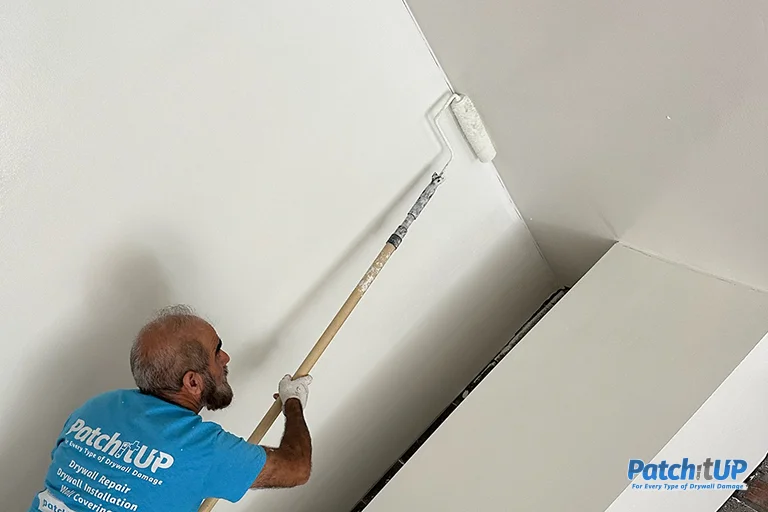
- Pole Sanders are ideal for reaching large wall and ceiling areas. Look for a sander with a pivoting head for better corner maneuverability.
- Hand Sander: This tool is perfect for smaller areas, corners, and detailed sanding. Choose a comfortable grip and dust collection capabilities.
Sandpaper:
Choose various grits (abrasiveness levels) for different stages of sanding:
- Coarse Grit (80-100): Used for initial smoothing and removing heavy mud ridges.
- Medium Grit (120-150): Used for general sanding and refining the surface.
- Fine Grit (180-220): Used for final sanding to achieve a super-smooth finish.
Shop Vacuum/Wet/Dry Vacuum:
A powerful vacuum is essential for dust control during and after sanding.
Other Tools:
- Utility Knife: Useful for scraping away excess mud or debris.
- Sponge Sander: Ideal for sanding around corners, electrical boxes, and tight spaces.
- Drop Cloths: Protect your floors and surrounding areas from dust.
Drywall Sanding: A Step-by-Step Guide

Here’s a detailed breakdown of the drywall sanding process:
1. Preparation:
- Wear your PPE (respirator, safety glasses).
- Cover floors and furniture with drop cloths.
- Ensure the drywall mud is completely dry.
2. Initial Sanding (Coarse Grit):
- Start with a coarse-grit sandpaper (80-100 grit) attached to your pole sander.
- Use a light, circular motion, applying even pressure across the surface.
- Focus on knocking down high spots, ridges, and imperfections around screw heads and tape seams.
3. Corner and Seam Sanding:
- Switch to a hand sander with coarse-grit sandpaper for corners and tight spaces.
- Use a sponge sander for detailed work around electrical boxes and outlets.
- Be gentle around corners to avoid sanding through the paper facing the drywall.
4. Second Sanding (Medium Grit):
- Replace the sandpaper with a medium grit (120-150 grit).
- Repeat the sanding process, focusing on refining the surface and removing any remaining scratches or gouges left by the coarse grit.
5. Light Check and Touch-Ups:
- Use a vital light source to reveal any imperfections that might have been missed. These may appear as shadows or uneven textures.
- Mark these areas with a pencil for a touch-up with additional joint compound.
- Once the touch-up mud dries, re-sand those areas with medium-grit sandpaper.
6. Final Sanding (Fine Grit):
- Equip your sander with a fine-grit sandpaper (180-220 grit).
- Perform a light, final sanding pass across the entire surface.
- The goal is to achieve a smooth finish that feels flawless.
7. Cleaning Up:
- Use your shop vacuum to remove all dust thoroughly.
Drywall Sanding: Pro Tips and Techniques
Mastering drywall sanding goes beyond just following the steps. Here are some valuable tips to elevate your technique and achieve professional-looking results:
Sanding Technique:
- Maintain a consistent sanding motion, avoiding excessive pressure that can gouge the drywall paper.
- Sand in a circular pattern, overlapping slightly with each pass to ensure even coverage.
- For corners, use a slight angling motion with the sander head to avoid digging in.
- Regularly rotate the sanding pad to prevent uneven wear and tear on the sandpaper.
Lighting is Key: Utilize a vital light source, like a work light or headlamp, held at an oblique angle to the wall. This helps highlight even the slightest imperfections that might be missed under standard lighting.
Minimize Dust Woes:
- Invest in a shop vacuum with a HEPA filter for superior dust collection.
- Sand in sections and vacuum frequently to prevent dust buildup. This ensures cleaner sanding and a clearer view of the surface.
- Empty your vacuum dust canister regularly to maintain suction power.
The Art of Patience:
- Resist the urge to rush through the sanding process. Take your time, focusing on achieving a smooth finish rather than speed.
- Remember, removing excess mud is more accessible than repairing accidentally sanded-through paper.
Sanding Between Coats:
- After applying multiple coats of joint compound, light sanding with fine-grit sandpaper between each coat is recommended. This ensures a smooth overall texture before the final sanding.
Safety First:
- Always wear your respirator and safety glasses throughout the sanding process.
- Empty your vacuum dust canister outdoors to minimize dust inhalation in your living space.
Texture Considerations: If your project involves a textured finish, sanding techniques may vary depending on the desired outcome. Consult a professional or research-specific sanding techniques for textured drywall finishes.
Beyond the Basics: Advanced Drywall Sanding Techniques
While the core steps remain similar, advanced techniques can be employed for specific situations:
- Flattening High Spots: For excessively proud screw heads or bumps, use a jabbing motion with a coarse-grit sandpaper to quickly remove the high point before transitioning to a circular motion for overall sanding.
- Repairing Sand-Throughs: If you accidentally sand through the drywall paper, don’t panic. Apply a thin layer of joint compound, let it dry completely, then re-sand the area with fine-grit sandpaper.
- Sanding Around Repairs: Sanding techniques differ slightly when repairing holes or damaged drywall sections. Focus on smooth transitions between the repaired area and the existing drywall surface.
The Final Touches: Priming for Perfection
Once you’ve achieved a flawless, dust-free sanded surface, it’s time for priming. Priming creates a uniform base for paint, promoting better Adhesion and coverage. Opt for a primer specifically designed for drywall and follow the manufacturer’s instructions for application.
Final Thoughts: The Reward of a Smooth Finish
Drywall sanding might seem tedious, but with the right tools, techniques, and, most importantly, patience, you can achieve a smooth, professional-looking finish that elevates your entire painting project. Remember, a well-sanded surface is the foundation for a flawless paint job, transforming your home renovation dreams into a beautiful reality.
FAQ’s
Q. Do I need to sand after every coat of joint compound?
A. While a final sanding is crucial before painting, light sanding between coats is generally recommended. Use fine-grit sandpaper (around 180-220 grit) to smoothen the surface after each coat application. This ensures a uniform texture for the final sanding stage.
Q. How many times should I sand drywall?
A. The number of sanding passes depends on the initial mud application and your desired finish. Typically, three sanding stages are involved:
- Coarse grit for initial smoothing and removing ridges.
- Medium grit for general sanding and refining the surface.
- Fine grit for achieving a super-smooth, paint-ready finish.
Q. Can I sand drywall by hand?
A. Hand sanding is possible for small areas, corners, or detailed work. However, a pole sander is much more efficient for enormous wall and ceiling surfaces and saves time and effort.
Q. What grit sandpaper should I use for sanding drywall primer?
A. Light sanding with very fine-grit sandpaper (around 220 grit or higher) can be beneficial after applying primer. This removes minor imperfections on the primed surface, ensuring exceptional paint adhesion.
Leave a Reply