Plaster is a common material used on walls and ceilings, known for its smooth finish and durability. However, over time, plaster can develop cracks, chips, or holes due to age, water damage, or structural movement in the building. Many homeowners try to handle these repairs themselves to save money or avoid hiring a professional. While DIY plaster repair is possible, it requires care, patience, and the right techniques. Unfortunately, small mistakes can easily lead to poor results, wasted effort, or even more damage to the wall.
Below are some of the most common mistakes people make during DIY plaster repair—and practical ways to avoid them.
1. Not Preparing the Surface Properly
Mistake: One of the biggest errors is starting the repair without cleaning or preparing the damaged area. Loose plaster, dust, dirt, or old paint often stay on the surface, and when new plaster is applied over it, it fails to bond and eventually falls off.
How to Avoid: Start by carefully scraping away any cracked, loose, or damaged plaster. Remove flaking paint and clean the area with a damp cloth to get rid of dust and debris. Let the surface dry completely before applying fresh plaster. A clean base ensures better adhesion and a longer-lasting repair.
2. Choosing the Wrong Materials
Mistake: Many DIYers use the wrong type of product, such as general wall putty or joint compound, thinking it will do the job. While these can fill small gaps, they don’t match the strength or durability of real plaster.
How to Avoid: Always use a plaster product meant for the type of wall or ceiling you are repairing. For traditional plaster walls, lime-based plaster or gypsum plaster is often the best choice. For small holes or chips, use patching plaster. Investing in the right material ensures a repair that blends well and lasts longer.
3. Mixing Plaster Incorrectly
Mistake: Plaster needs to be mixed with water in the correct ratio. If it’s too thick, it becomes hard to spread and may dry unevenly. If it’s too runny, it will not stay on the wall and may shrink as it dries. Many beginners also make the mistake of mixing a large batch that hardens before they can use it.
How to Avoid: Carefully follow the instructions on the packaging. Mix small amounts at a time so the plaster doesn’t dry out in the container. Aim for a smooth, lump-free consistency that is easy to spread with a trowel or spatula.
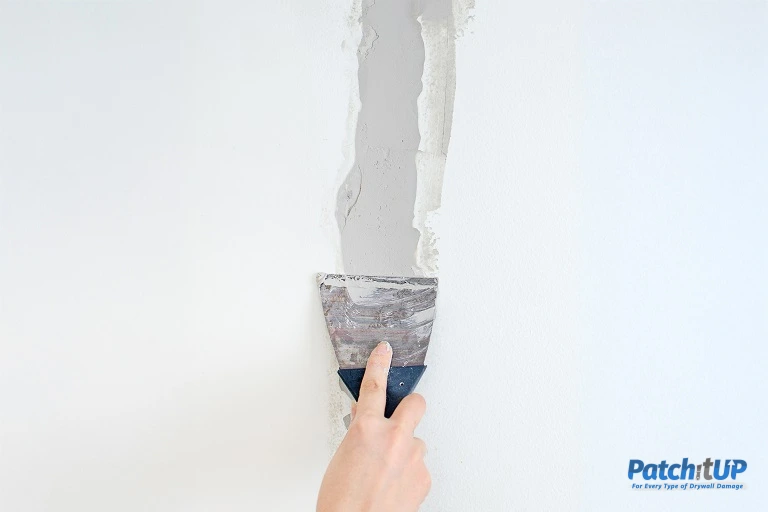
4. Applying Plaster in Thick Layers
Mistake: It’s tempting to apply a thick coat of plaster to cover cracks or holes quickly. But heavy layers dry unevenly, crack, or pull away from the wall.
How to Avoid: Apply plaster in thin, even layers. For deeper holes or larger cracks, build up several thin coats, allowing each layer to set before adding the next. This technique creates a stronger bond and prevents cracking.
5. Rushing the Drying Process
Mistake: Painting over plaster before it has dried fully is another common issue. Fresh plaster holds moisture, and sealing it with paint too early traps that moisture inside, causing peeling, bubbling, or staining.
How to Avoid: Give plaster enough time to dry. Depending on the thickness, humidity, and room temperature, drying can take anywhere from a few days to a week. Always wait until the plaster is completely dry before painting or adding a finishing coat.
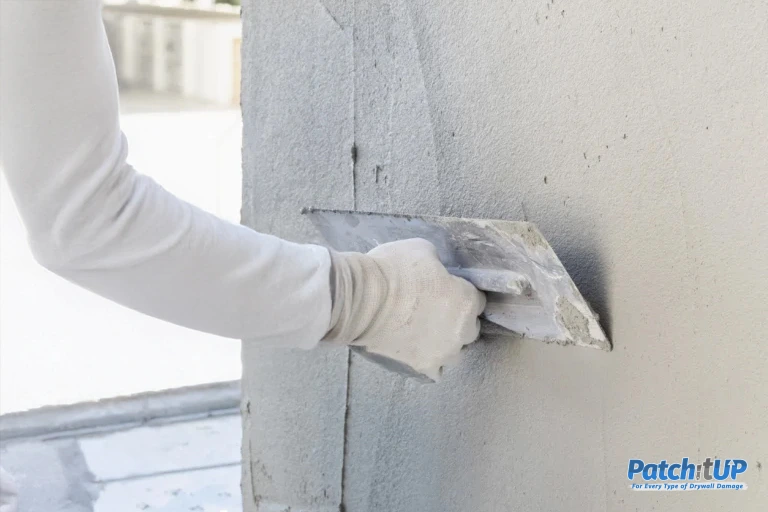
6. Poor Smoothing and Sanding Techniques
Mistake: An uneven surface can ruin the look of a repair. Some DIYers do not smooth the plaster properly during application, while others sand too harshly once it’s dry, leaving scratches or uneven patches.
How to Avoid: While applying plaster, use a wide trowel or putty knife to smooth it as much as possible. After drying, sand lightly with fine-grit sandpaper until the repaired area is level with the surrounding wall. Gentle sanding ensures a professional-looking finish.
7. Ignoring Texture and Finish
Mistake: A repaired area that doesn’t match the rest of the wall stands out. Many people forget to match the texture or paint finish, leaving behind a patch that looks obvious and unfinished.
How to Avoid: Observe the original wall texture before you start. If it has a textured finish, use the right tools (such as a sponge, brush, or roller) to recreate the effect before the plaster sets. Once the surface is ready, paint with the same shade and finish as the rest of the wall.
8. Overlooking Safety Precautions
Mistake: DIY plaster repair may seem safe, but plaster dust and debris can cause irritation to your eyes, skin, and lungs. Many people skip basic safety gear, which puts their health at risk.
How to Avoid: Always wear protective gear such as safety goggles, gloves, and a dust mask. Work in a well-ventilated area to avoid inhaling dust and fumes. Taking these precautions makes the repair process safer and more comfortable.
Final Thoughts:
DIY plaster repair can save money and give you the satisfaction of fixing your home yourself, but it requires patience and the right methods. The most common mistakes—like poor preparation, wrong materials, thick layers, and rushing the drying process—are easy to avoid if you know what to look out for.
By cleaning the surface properly, using the right plaster, applying it in thin coats, allowing enough drying time, and matching the finish, you can achieve a DIY plaster repair that blends seamlessly and lasts for years. With a little care, your walls and ceilings can look as good as new without the need for professional help.
FAQ for Common Mistakes in DIY Plaster Repair (And How to Avoid Them!
- What is the best way to remove plaster?
A. Use a hammer and chisel or a utility knife to carefully break and scrape plaster off the wall.
- What are the problems with plaster finishing?
A. Common problems include cracks, uneven surfaces, peeling, and poor bonding if not applied correctly.
- How long should plaster dry before you paint?
A. Plaster should dry fully, usually 5–7 days for thin coats and up to 2 weeks for thicker ones.
- What is the best method of removing damaged and loose plaster?
A. Scrape away loose plaster with a putty knife or chisel until you reach a solid surface before repairing.
Related Post:
- Best Tools for Drywall Repair in 2025: What Pros Recommend!
- Plaster vs. Drywall: Which is Better for Your Walls?
- What Is a Popcorn Ceiling? Pros, Cons, and Modern Alternatives!
Leave a Reply